
Share:

Summary:
The first step in any tank replacement project starts with an honest assessment of your current tank’s condition. Age alone tells part of the story—most heating oil tanks last between 15 and 20 years, with outdoor installations typically showing wear sooner due to weather exposure.
Look for visible signs that indicate replacement is necessary. Rust formation around seams, connections, or stress points signals metal deterioration that compromises structural integrity. Even surface rust often indicates more extensive corrosion beneath that requires professional evaluation.
Pay attention to your heating oil consumption patterns. An unexplained increase in usage could mean your tank is leaking, though this isn’t always obvious since leaks can occur only when tanks are full or water might be entering the system.
Certain warning signs require immediate action rather than waiting for your next scheduled maintenance. Persistent fuel oil odors inside your home indicate vapors that create both health concerns and fire hazards requiring urgent investigation.
Water contamination in your fuel tank creates multiple problems through bacterial growth and system damage that can spread throughout your heating equipment. Excessive condensation around your tank suggests ventilation problems or tank integrity issues that need professional diagnosis.
Unusual sounds from your heating system—including banging, grinding, or irregular operation patterns—suggest mechanical problems that can create safety hazards if operation continues without professional intervention. These sounds often indicate that your tank or connected systems are under stress and may fail without warning.
Visual inspection should include checking for oil stains around the tank area, especially near the base or connection points. Even small stains can indicate developing leaks that will worsen over time. The soil around outdoor tanks should be examined for discoloration or strong petroleum odors that suggest contamination.
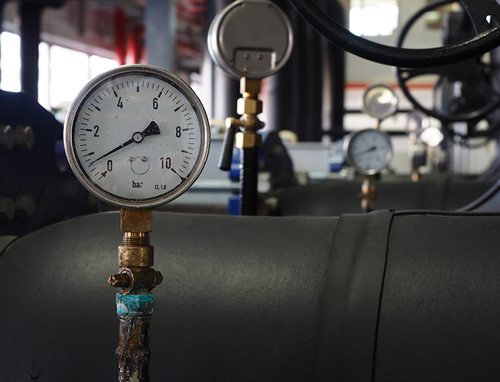
Professional tank testing provides the most reliable assessment of your tank’s condition. Commercial tank testers use specialized equipment to detect leaks that aren’t visible during routine inspections. This testing is particularly important for underground tanks where visual inspection is impossible.
Remember that no test can predict exactly when a tank will fail, but professional assessment helps you make informed decisions about timing your replacement before emergency situations develop.
Nassau and Suffolk Counties operate under delegated authority from the New York State Department of Environmental Conservation, which means local regulations may be more stringent than state requirements. Understanding these requirements before starting your project prevents delays and ensures compliance.
Both counties require oil tank removal certificates when decommissioning or removing tanks, whether above-ground or underground. This documentation serves as official proof that removal was completed according to environmental regulations and safety standards, which becomes crucial if you ever sell your property.
New York State law requires that all heating oil tanks be emptied, cleaned, and purged of vapors before removal. For underground tanks, both vent lines and fill lines must be removed, or fill lines must be capped with concrete. These requirements ensure environmental safety and prevent future contamination issues.
Licensed professionals must handle most aspects of tank removal and replacement to ensure proper disposal of hazardous materials and compliance with local codes. Attempting DIY removal not only violates regulations but also exposes you to significant liability if environmental contamination occurs.
The permit process varies depending on tank size, location, and local jurisdiction requirements. Working with experienced contractors familiar with Nassau and Suffolk County regulations streamlines this process and ensures all necessary documentation is properly filed.
Soil testing may be required, particularly for underground tanks or if contamination is suspected. This testing confirms whether oil has leaked into surrounding soil and determines what remediation steps are necessary before project completion.
Professional tank removal and replacement follows a systematic process designed to ensure safety and environmental compliance. The process begins with site assessment and preparation, including obtaining necessary permits and scheduling utility markouts for underground installations.
Your contractor will first pump any remaining heating oil from the old tank, either transferring it to a temporary storage container or your new tank if it’s being installed simultaneously. This oil transfer prevents waste and maintains your heating supply during the transition.
The actual removal process varies significantly between above-ground and underground installations, but both require careful handling to prevent spills and ensure proper disposal of all materials.
Above-ground tank replacement typically represents the simpler and more cost-effective option, with most projects completed in a single day. The process begins with disconnecting all fuel lines, electrical connections, and monitoring equipment while ensuring no residual oil remains in the system.
Contractors cut the old tank into manageable sections for removal, following New York regulations that require thorough cleaning before disposal. This cutting process must be performed safely to prevent any remaining vapors from creating hazards during removal.
New tank installation starts with preparing the foundation or mounting surface to ensure proper support and compliance with current codes. Modern tanks often require different mounting specifications than older models, particularly if you’re upgrading to double-wall construction.
The installation process includes connecting new fuel lines, which often need upgrading to meet current safety standards. Many older installations use rigid metal lines that modern codes require to be replaced with flexible lines that better withstand ground movement and thermal expansion.
Professional installation includes testing all connections for leaks, calibrating monitoring equipment, and ensuring proper ventilation around the new tank. Your contractor should also install any required safety equipment such as overfill alarms that prevent spills during future deliveries.
Final steps include system testing to ensure proper operation and providing you with all documentation required for local compliance. This documentation becomes part of your property records and may be required for insurance purposes or future property sales.
Underground tank removal presents significantly more complexity and cost due to excavation requirements and higher environmental risk potential. The process begins with careful excavation around the tank using appropriate equipment that won’t damage the tank during uncovering.
Soil contamination testing becomes critical for underground removals since any leakage may have affected surrounding soil and potentially groundwater. Professional contractors take soil samples from multiple locations around the tank to determine the extent of any contamination that requires remediation.
Contaminated soil removal and replacement adds substantial cost to underground tank projects, but addressing contamination immediately prevents much higher future costs and legal liability. Professional remediation ensures that contamination doesn’t spread to neighboring properties or water supplies.
The removal process itself requires specialized equipment to safely lift tanks from excavated areas without causing additional environmental damage. Underground tanks often contain more residual material than above-ground installations, requiring additional cleaning and disposal procedures.
Many homeowners choose to replace underground tanks with above-ground installations to avoid future excavation costs and enable easier inspection and maintenance. This conversion requires running new fuel lines from the above-ground location to your heating equipment, but eliminates many long-term concerns associated with buried tanks.
Excavation areas must be properly backfilled with clean soil and restored to original grade levels. Professional contractors ensure proper compaction to prevent future settling that could damage landscaping or structures. The restoration process should return your property to its original condition with no visible signs of the work performed.
Replacing your old heating oil tank represents a significant investment in your home’s safety, efficiency, and value. Understanding the complete process helps you make informed decisions about timing, contractor selection, and replacement options that best serve your family’s needs.
The cost of professional tank replacement—typically ranging from $2,900 to $3,500 on Long Island—pales in comparison to potential cleanup costs exceeding $20,000 if aging tanks fail and contaminate your property. Professional replacement also ensures compliance with Nassau and Suffolk County regulations while providing documentation that protects your property value.
For reliable heating oil service and professional guidance throughout your tank replacement project, we bring nearly 50 years of experience serving Long Island families with the expertise and dependable service you need to keep your home safe and warm.
Article details:
Share:
Continue learning:


You can now order home heating oil even more conveniently by downloading our mobile app, available on the App Store and the Play Store.